Introduction
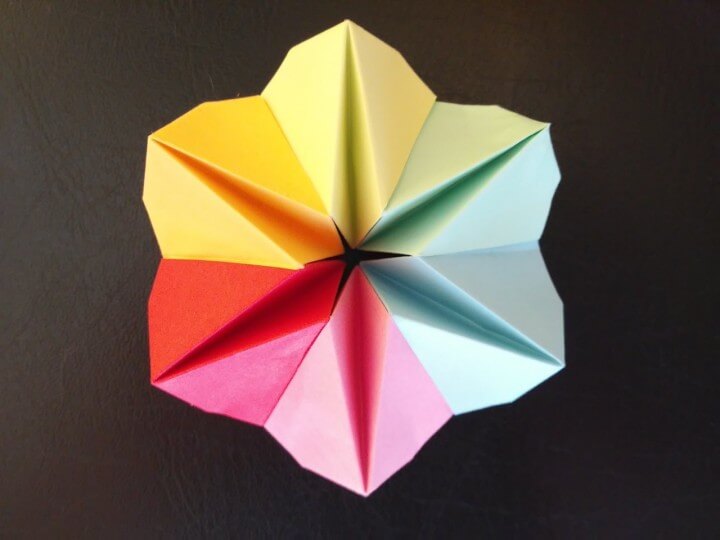
Origami characters and objects are fun to make and display; they also make great gifts. What better gift to give than a beautiful bouquet of origami flowers! Origami flowers will never wilt and you do not need to worry about checking for bugs or watering them. With a spray of your favorite perfume, or that of the recipient, you can create a fragrant, personalized gift.
Instructions
There are as many varieties of origami flowers as there are fresh flowers. The flower you’re going to create today is slightly more advanced than your basic origami flower because it will be blooming, much like a rose or a daisy, rather than still a bud or an overly simple flower shape, like a tulip. Carefully follow these instructions and, with some practice, you will be a great origami florist in no time.
Steps to make an origami flower:
- Start with your origami paper colored side down. Fold the paper in half by making a fold across the diagonal of the square (taco fold). Crease the paper and unfold it again.
- Repeat the same fold that you made in step 1 but this time fold, crease and unfold the opposite points.
- Fold the paper in half making a fold that would resemble a hot dog bun (from the bottom half to the top half). Crease the paper and unfold it again.
- Make a hot dog fold again with opposite sides. Crease the paper and unfold it again.
- Take the left edge of the paper to the center of the square and make a crease. Do the same with the right edge of the paper and then unfold both sides.
- Fold the top edge of the paper to the center of the paper and make a crease. Do the same with the bottom edge of the paper and unfold both the top and the bottom folds.
- Your paper should have an “X” shaped crease in the middle as well as three creases going down and three creases going from side to side.
- Take each corner of the square and fold them into the center where all of the diagonal creases meet. Leave the folds instead of just making the creases.
- Turn the entire origami shape over to the opposite side.
- Take each of the remaining points and fold them into the center where all of the diagonal creases meet. Crease and keep the folds.
- Take each point from the center of the square that you just created and fold it out towards the outer edge of the square but only about ¾ of the way.
- Turn the entire origami shape over again.
- Take the middle corner of the center square and fold it towards the outer edge of that same inner square so that you form a triangle with your fold and the one corner that you just folded exposes the non-colored side of the paper.
- Turn the origami shape over.
- Fold the entire shape over onto itself like a hot dog. Create a crease and unfold the shape. Repeat this step with the opposite edges but this time leave the paper folded.
- Push the corners of your shape towards the center of the piece. Do this by holding the origami shape between your thumb and index fingers at the top corners and then push the left and right sides of the shape towards the center.
- Shape the petals of the flower with your fingers and add a pipe cleaner or floral wire stem.
Other Tips
To really make this flower bouquet look authentic, you can learn how to make origami leaves and attach those leaves to your flower using floral tape. Put your flowers in a vase and enjoy them for much longer than you would be able to enjoy traditional fresh flowers.

Leave a Reply